
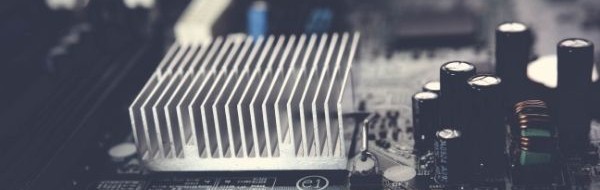
The heatsink is a vital part of your computer. Most users often ask the question, how to remove a heatsink? Here’s our quick CPU cooler removing guide, which will help you every step of the way. Whether you want to repair or replace it, you want to ensure that you do it the right way, so you don’t damage your processor.
Removing the heatsink is quite simple. The first thing you need to do is use your PC for a few minutes to soften the thermal paste. Then it’s a matter of opening up your PC, disconnecting the fan cables, slowly wiggling the heatsink, and lifting it away from the processor. If you’re looking for a new CPU cooler then the highly rated Noctua NH-D15 or a Cooler Master Hyper 212 are excellent options.
How to Remove Heatsink from CPU: Step by Step Guide
Here are the steps on how to remove heatsink from motherboard and CPU. The process is the same for all types of coolers. The only difference here is the type of fastener, whether it’s with screws, pins, or brackets.
1. Power Off Your Computer
If you’re opening your computer up, the first thing you need to do is to power it down and unplug it. This makes sure that no power is running in the system when you open it up and touch it.
One important note here is that if you have not used your PC for a while, you may want to start it up and use it for a few minutes. This will warm up the thermal paste between the heatsink plate and the CPU.
Cold thermal paste can fuse the heatsink and the CPU, and if you pull on it too hard, you may damage your processor.
2. Disconnect the CPU Fan Headers from the Motherboard
The next step is to disconnect the CPU fan header from the motherboard so you can safely pull the remove the heatsink. If your heatsink and fan have RGB, be on the lookout for its header, too.
3. Unscrew or Loosen the Brackets of the Heatsink
Now that you’ve unplugged all the power connectors to the motherboard, it’s time to remove the heatsink. The heatsink assembly is usually braced to the board via screws.
Using a screwdriver, turn each screw counterclockwise to loosen them. Make sure that you follow a diagonal pattern to keep the weight even. The screws are small. Keep them in a separate box, so you don’t lose them.
4. Remove the Heatsink from the CPU
Removing the heatsink from your CPU is simple, but it can sometimes get tricky. Hold the heatsink together with the mounting bracket firmly. Lightly twist the cooler back and forth until you feel the seal of the heatsink and the CPU loosening. Gently lift it away from the CPU.
Make sure that the CPU is still seated in the socket as forcing it would damage your processor.
If the heatsink does not move back and forth when you twist it, you need to turn your computer on so the processor heats up and melts the thermal paste.
5. Remove the Heatsink Fans
Now that you have safely removed the entire CPU cooler assembly, you can remove the fans. The fans are attached to the heatsink with clips for most aftermarket coolers. You can easily unclip them and slide them out, making them easier to replace or clean.
In cases where the fans are fitted with screws, simply unscrew them and slide them up to avoid hitting the other components.
How to Remove CPU Fan Intel
Some Intel CPUs come with a stock cooler. Removing them is a straightforward process, and following the guide we provided will help you. The biggest difference between Intel stock coolers and aftermarket ones is that it uses push pins instead of a screw.
To loosen these pins, you need to turn them counter-clockwise and pull them up. There are arrows on the heads of the pins that will show you how to turn them.
How to Remove AMD Heatsink
For AMD coolers and heatsinks, the process is the same. Although, they have a type of cooler mounted to the motherboard with retention brackets. Instead of unscrewing the entire assembly, look for the locks on both sides and gently pull them up. This should unlock the heatsink and fan from the frame.
How to Remove Fan from Heatsink Cooler Master
Removing the fans from a Cooler Master heatsink is simple as an aftermarket CPU cooler. You can follow the steps outlined above, and don’t forget to remove the fan headers.
Fans from most aftermarket brands like Cooler Master, Noctua, and others are attached to the heatsinks with fan clips. All you need to do is pull these up and slide the fans off the heatsink. That’s it.

Final Words About How to Remove CPU Cooler & Heatsink
All CPU coolers and heatsinks have a similar design. The steps on how to remove a heatsink will be the same whether you have an Intel or AMD processor. Our CPU Cooler removing guide can help you make it easier for you as long as you follow the steps.
Lastly, in case you’re looking for a new processor cooler then the highly quality Noctua NH-D15 and Cooler Master Hyper 212 are the best rated options on the market.
Table of Contents